The rise and fall of the pedal board
by Gene Baker, editor, Music Insider Magazine

 ear in any industry goes through fads. In the guitar world, much of these gear trends are driven by technology and its perpetual wheel of evolution — as manufacturers create new gear and artists ask for new ideas. Just as a wheel is round, we will always witness ideas to update an old product come full circle again.
For example, when I was 11, just staring to play electric guitar in 1977, stomp pedals and coil guitar cables were all the rage. Bell bottoms were huge, hair styles were long, music was getting louder, and life was looking pretty cool. Fast forward to 2013, and stomp pedals are more popular than ever with tons of brands and options. In the good ole days, there were only small pools of companies doing this.
We’ve seen the birth and death and rebirth of some companies such as Electro-Harmonix and others coming, going, merging, fading and major comebacks including Fender going through its change of hands from CBS to the William Schultz. Floyd Rose reached an all-time high and then an all-time low to come back again today as one of the best tremolos on the planet. Even the coil cable is back on a large scale with an entirely new level of quality.
So to say the least, it’s a great time to be a musician because there is so much gear these days plus all the old gear being recycled, home recordings, YouTube, etc … It can be very exciting if you embrace technology, but that doesn’t always come easy. So many things have changed from the early days when amplifiers were rather simple without the bells, whistles and modern hoop jumping we make our gear perform today.
Much of this can be blamed on our heroes and the music captured since recording began. Someone will always want to recreate that sound and that magic. Many manufacturers start out as someone trying to build a sound he or she heard such as Alfonso Hermida of Hermida Audio who worked as a college electronics teacher but fell in love with the tone of Robben Ford’s guitar solo on a George Harrison tune.
Eventually even Robben ended up using this pedal dubbed the Zendrive because it was like a Dumble amplifier fingerprint in a tiny pedal for his tone, which made it easy to take overseas when backline gear was sometimes unknown. With his simple pedal board, he felt safe in being able to achieve a tone that represented him properly.
A simple pedal board is one thing, but many pedal boards can get large in a hurry if you’re addicted to that rush. Take me for instance. In the early days, I started with one stomp pedal, an Electro Harmonix Power Booster and the Small Stone Phase Shifter. In the 80’s, the rack years came, and midi pedals took over. Today, a wide assortment of those I’ve mentioned are very popular, and all have a very useful function. Most equipment today covers multitasking and is getting smaller. We have pedals and boards to choose from in all sorts of shapes, sizes and abilities.
The pedal board: In building a pedal board, there are a lot of details to address to eliminate noise, power everything, wire up the board, connect everything with custom cables, eliminate ground loops, build the board itself and use pedal loop switchers and midi channels. You have to figure out how to mount the pedals then use a case to protect the board while on the road. With programming to learn and manuals, it can all be quite the journey. I have a place where old pedal boards go to die, like a small wasteland of different size boards from large to small, single-, double- and even triple-deck boards with pull outs.
The first step is buying up the toys you want. I suggest you don’t build your board until you think you have what you want or figure out a way to keep it universal until the board becomes what you want it to be.
When dealing with individual pedals, I guarantee you will buy, sell and trade some pedals a bunch of times until you settle down and find the tones you need. These days, I try not to rebuild Rome too often. I really have to be not getting along with something or just not using it, to make me make a change.
A simple way to make a pedal board is to use peg board material from your local hardware store. You can use zip ties to hold pedals into place. Many people use some of the more aggressive Velcro available, and sometimes it’s the best material to hold a pedal. I like using small hold-down cleats and zip ties, but even then on some pedals, they may not work. The more boards you make, the more you will find what’s important to you from size to weight to the pedals themselves.
The essentials are as follows: tuner, wah pedal, compressor for certain clean tones and some sort of overdrive/gain pedal for flavor on either a clean or dirty channel. All of these items are intended to hit the front end of your amp. Even the order in which they chain together can make a large difference in how they react with each other.
Essential effects: Then we have effects loop-based pedals which insert these effects in between the pre-amp and power-amp section of your amplifier, usually labeled Effects Send and Return. The essential effects for me are a delay and a modulation unit. I like a variety of delays so I need something programmable, and for modulation, I use everything from chorus, flange, phase to pitch/harmonizer-type effects, all requiring a programmable device.
The amplifier: The modern amplifier may have to recreate a variety of tones, so it is often a multi-channel amp and can have some other boost, equalizer and loop-to-volume functions to control.
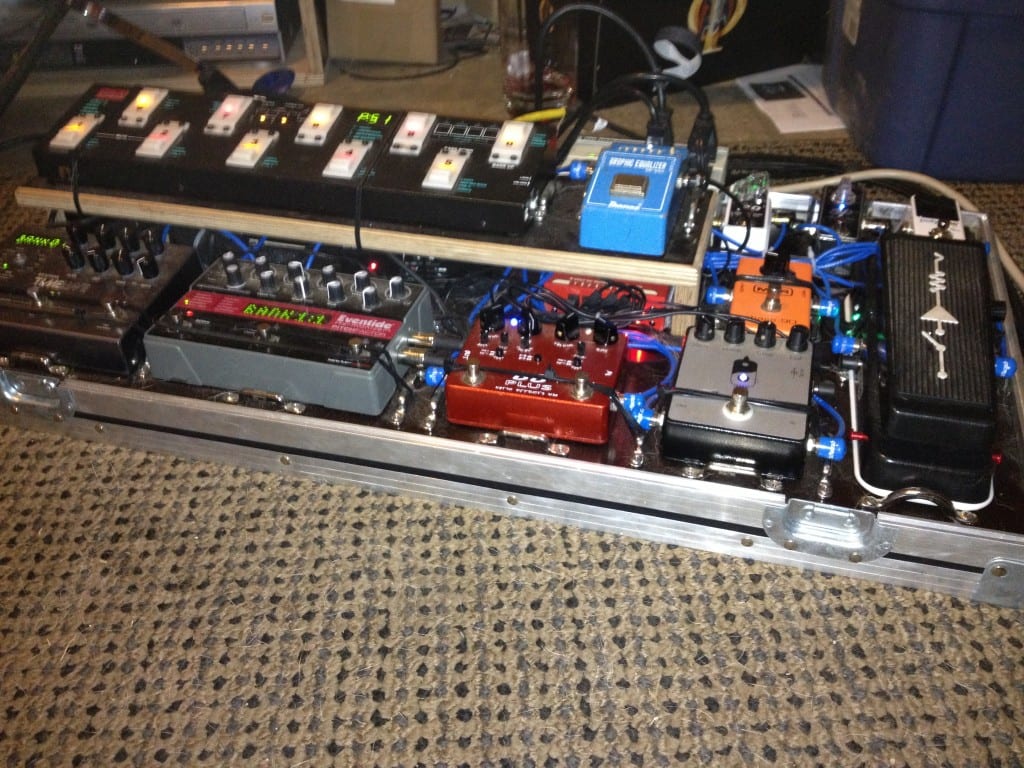
So now you have way too many buttons and more than you can tap dance, plus you have to sing and whatever else … This is where switcher/loop/midi pedals come into play. Voodoo Lab is well known for some great pedals to cover every one of these fields. I use a G LAB GSC-2 Guitar System Controller. It allows me six stomp pedal loops and to send a signal to another amp, and it will change up to four functions on amplifiers at a time, send out three separate midi-control commands to other pedals and has a built-in power supply to drive six pedals. All this is accomplished with a normal midi pedal layout to scroll through banks and patches. The loop function allows each pedal to be in separate loop, which you can assign in or out of the audio chain and save to a patch. One button commands these changes — everything you need to switch, from pedals to the amp.
The cables: Cables are another tedious part of a pedal board. To date, I have always used George L’s Cable Kit for my boards, as it comes with convenient, quality cables, and you can repair them fast without tools. But they can sometimes be a little bit of a pain, and so I highly suggest you buy a cheap cable tester, because they aren’t as easy to make as they may seem.
Lava Cable makes what many consider to be a pedal board cable upgrade kit, which I have yet to try. If you have room, there are many premade cables available to keep it simple, but you may often need to figure out the type of ends for the pedals you have. There is a lot of controversy in cables these days with companies like Asterope making some great headway with recording engineers and artists who endorse being able to back up what they hear with actual real-time monitoring visible in today’s recording software.
I use a separate effects loop unit for the amp loop-based pedals. The reason is you cannot criss-cross audio chains, or you’ll create noise ground loops.
The power supply: The same goes for the power supply feeding your effects. Your pedals going into the front input of your amp cannot share the same power supply as your amp’s loop effects. So I run two power supplies: a small T-rex for the pedals going into the front end of the amp and a Voodoo Lab Pedal Power Digital for the power-guzzling programmable units.
Power supplies are a key item to eliminate noise. If you use something like a more affordable Visual Sound 1 Spot power supply, you will notice every time you add another pedal onto the power chain, your noise level will increase. High-pitch squeals or a low, direct-current hum can often be a quick sign of a ground loop problem. In such a case, remove all items and just start adding one item or cable into the signal or power chain until you find the noise culprit.
The solo boost: One detail that I find key for guitar players is to have a useable solo boost to step out in a live mix, and this is not always an easy thing to accomplish unless you have a full-time sound man — but most of these died off years ago in the small, local bar scenes. Many guitarists think you have to boost the signal, which sometimes can be done. I like to use an EQ pedal inserted into the amplifier’s effects loop because you have a rather clean dB boost available and the ability to control the tone. I actually use my EQ as a volume cut, because boosting the signal in the loop seems to alter the tone too much. Instead, I turn it on to lower rhythm volumes and turn it off for a full output solo boost. Then my tone stays more consistent. This works great on any clean, crunch or dirty channel.
The case: You definitely need a safe carrying case. There are plenty of affordable pedal board cases on eBay, so do a little research, because it’s really hard to make a quality carrying case and save money for what it costs in time and materials compared to brand new or used prices of items available. This also goes for pedal boards, but I find the boards to be much more personal, and the parts I change most are based on how they’re wired, and pedal sizes vary greatly.
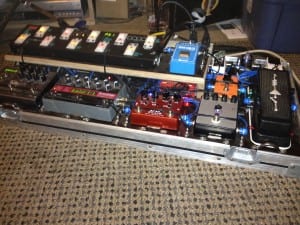
Here are the pedals on my board:
- From guitar to amp – controlled by the G LAB GSC-2 controller, TC Electronics PolyTune tuner, Xotic Effects EP Booster, Xotic Effects SP Compressor, Dunlop Custom Audio Wah, Hermida Audio Zendrive 2, Xotic Effects BB Plus and MXR Phase 90
- Effects loop pedals – controlled by a G LAB MF-4 Remote Loop via the GSC-2, Ibanez GE-601 Graphic EQ, Eventide PitchFactor and Strymon TimeLine
If you want more information about guitar pedals or pedal boards, I recommend you visit these sites below. May your next pedal board live long and prosper.
http://www.palmer-germany.com/mi/en.htm
http://www.olddogproducts.com/


